Welcome
It is important that our Co-Edition partners can create files according to our guidelines in order for them to print as expected, and we want to help you do this as easily and as quickly as possible.
This site has been created to explain what you’ll need to know when working with the InDesign files we have supplied, how to easily load and use our settings, how to create perfect print ready PDFs and how to check your PDF plotters.
Creating Text PDFs (InDesign)
1. Only Ever Work On The Translation Layer
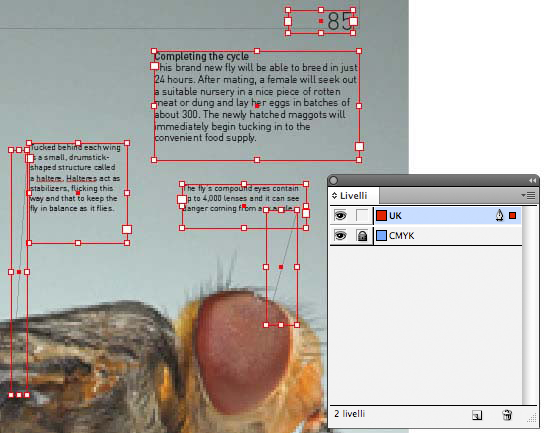
All our documents contain 2 standard layers:
The Translation Layer, “UK” or “US”
This contains everything that can be translated or re-positioned (such as text, leader lines, logos and signatures). This layer can be re-named to reflect your own language translation if you want (eg: FRA, ESP, ITA, etc).
The Colour Layer, “CMYK”
This contains all colour images and tints that cannot be translated, and are common to all language editions of the book. It will usually be locked when you receive the file, and you should not change anything on it or ever unlock it.
Layers can be hidden or revealed by clicking on the eye icons to the left of the layer name.
2. Only Ever Use Process Black
All items on the Translation layer are to be set to PROCESS BLACK. No other colour is to be used for translations.
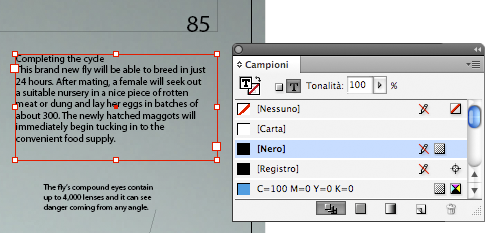
Any tint of PROCESS BLACK can be used from 1 to 100%. 0% is not allowed.
The spot colour ‘TEXT BLACK’ which we used to use for these translatable items in QuarkXPress is not used in InDesign.
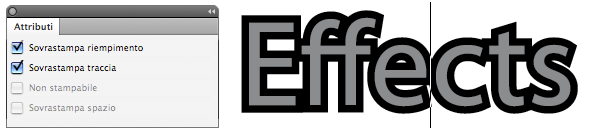
3. Ensure Everything Is Set To Overprint
Text set to 100% black will be already be set to overprint by the document preferences and in the assigned style sheets.
This should be left as it is set (as below)
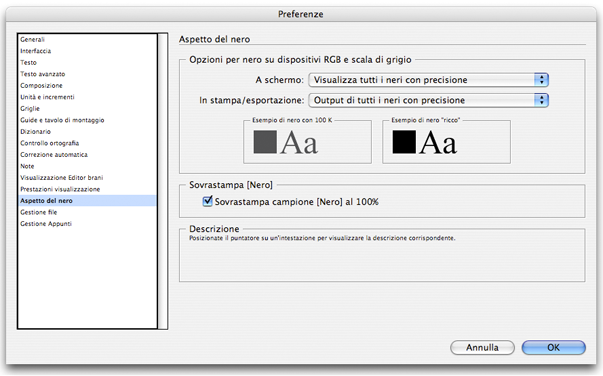
Using the Attributes palette in InDesign all text, images and lines should be set to:
‘Overprint Stroke’ for lines
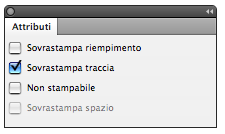
‘Overprint Fill’ for lines
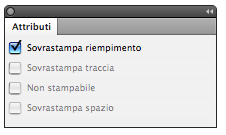
or sometimes both
Newly added pixel images should be set to overprint in InDesign. (Watch video)
Newly added vector images should be set to overprint in Illustrator. (Watch Video)
Viewing Overprinting and Separations
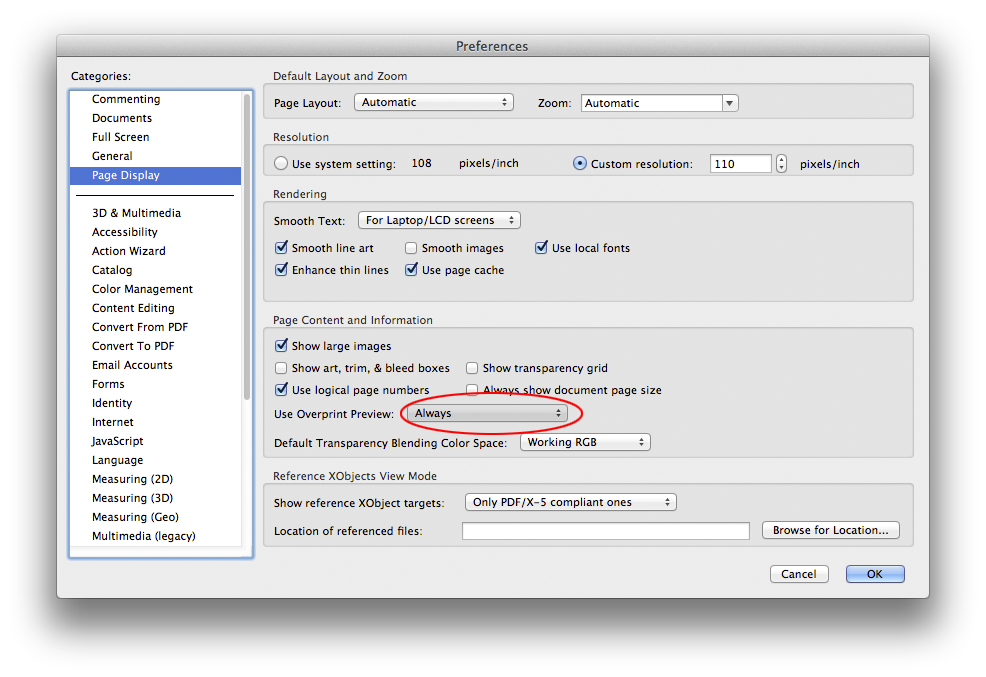
Sometimes, the effect of coloured text is achieved by printing tints of overprinting black text on top of coloured objects on the CMYK layer. This effect can be viewed in InDesign using Overprint Preview (Select VIEW > OVERPRINT PREVIEW).
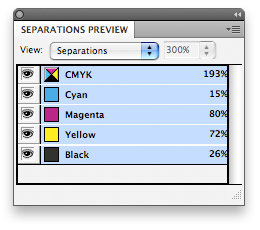
Select WINDOW > OUTPUT > SEPARATIONS PREVIEW > SEPARATIONS, and use the dropdown menu to select separations. Click on the eye icon on the black channel to switch off and you should not see black elements remaining or leaving any gaps.
4. Export To PDF Using The Supplied Setting
The PDF should be exported directly from InDesign (FILE > EXPORT) using the supplied PDF Preset PRH_PDF_Translation
- This is a different PDF setting to the one used for jackets.
Download the PRH_PDF_Translation.joboptions export preset here
To use this preset, it must first be imported into InDesign. To do this, do the following:
-
In InDesign, go to File > Adobe PDF Presets > Define > Load
-
Find the PRH_PDF_Translation.joboptions you have downloaded
-
Click Open.
When exporting only the Translation layer should be shown, switch off the other layers. Each page should be exported as a separate single page PDF. To export lots of pages at once, we have developed a script to help you. This script will run in English only and for Mac OS X only.
Download Exporter here
Once downloaded, place the script in the location indicated in the Script_Location.rtf file before running it.
Creating jackets
FSC Logo
UK “CA” and EU “CE” Safety logos
Creating jacket PDFs (InDesign)
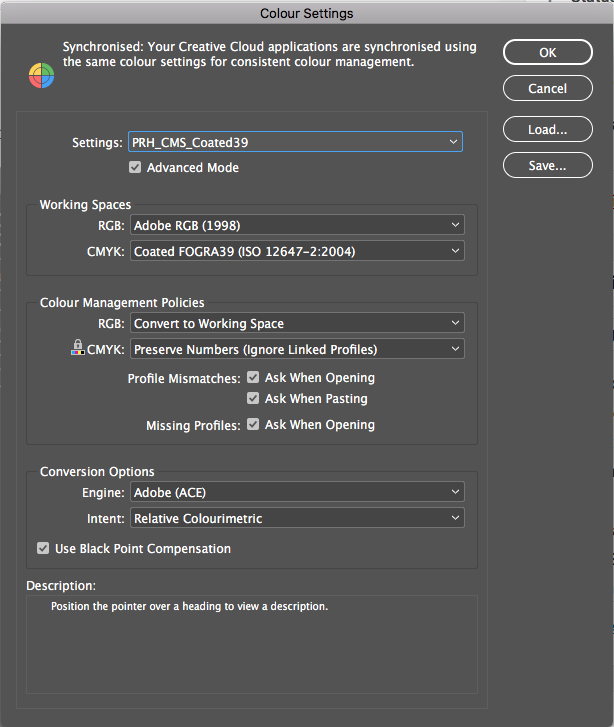
1. Work Using The Penguin Colour Settings
To ensure that your colours print as expected it is important to load and select our Penguin Group colour settings.
Download the correct settings file
Once downloaded and unzipped, to load into InDesign, choose EDIT > COLOUR SETTINGS
In the Colour Settings box, click the Load… button. Select the PRH_Colour_Settings_Coated39.csf file and press OK. The correct Settings for InDesign look like this.
2. Only Use Spot Colours For Special Inks And Finishes
Jackets are designed mainly in CMYK, although Spot Colours and special finishes may sometimes also be used with prior agreement.
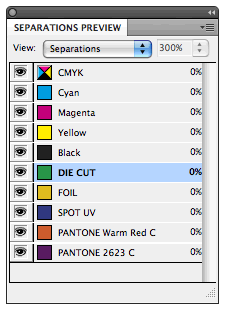
Each spot colour and different finish should be identified by a spot colour in InDesign. (e.g. jackets special finishes such as foils, die cutting or laminations).
You can see a list of spot colours used in InDesign using the Separations panel. WINDOW > OUTPUT > SEPARATIONS PREVIEW
3. Set Spot Colours For Special Finishes To Overprint
In order to apply special finishes on top of the CMYK and Pantone inks, spot coloured objects should be set to Overprint using the Attributes panel WINDOW > ATTRIBUTES.
It may be necessary to select new pixel images in order to set overprint. (Watch video)
It may be necessary to set new vector content to overprint using Illustrator. (Watch video)
Viewing Overprinting and Separations
By switching off a separation you can check that it will not ‘knock-out’ or remove the ink underneath it.
Select WINDOW > OUTPUT > SEPARATIONS PREVIEW > SEPARATIONS, and use the dropdown menu to select separations. Click on the eye icon for special inks to switch off. You should not see any gaps below foils, cutter guides or spot UV.
4. Export To PDF Using The Supplied Setting
The PDF should be exported directly from InDesign (FILE > EXPORT) using the supplied PDF Preset PRH_PDF_Jackets_Coated39_PDF-X4
- This is a different PDF setting to the one used for text pages.
Download the Penguin Jacket PDF export preset here
To use this preset, it must first be imported into InDesign. To do this, do the following:
-
In InDesign, go to File > Adobe PDF Presets > Define > Load
-
Find the PRH_PDF_Jackets_Coated39_PDF-X4.joboptions you have downloaded
-
Click Open.
When exporting, all layers should be shown. The PDF should contain one page with the CMYK and all spot colours on top of each other.
- Laser proofs are not colour accurate and cannot be accepted for Jacket colour matching. Only contract quality proofs (e.g. Epson proofs) can be accepted (with FOGRA Media Wedge attached and certified to FOGRA39). Publishers who have not supplied contract proofs can have no objection to final jacket colour discrepancies.
Checking PDF plotters
“How to use this book” pages
For instructions on how to create PDFs for these pages, click here.
QuarkXpress PDF instructions
Hi-res promotional material
How to use Combo
- The CMYK PDFs should be inside one folder and the text PDFs in another folder.
- Double-click the app.
- You will see a menu asking you to specify a name for the InDesign document. It asks for it to be in the format ISBN_TitleNoSpaces. This is a DK specific workflow but please ensure whatever name you use, you do not use spaces or other punctuation characters.
- You will then see 3 buttons. If you want bleed on your marketing material use option Go (Plotters – with outer bleeds), otherwise use Go (standard). Do not use the middle option.
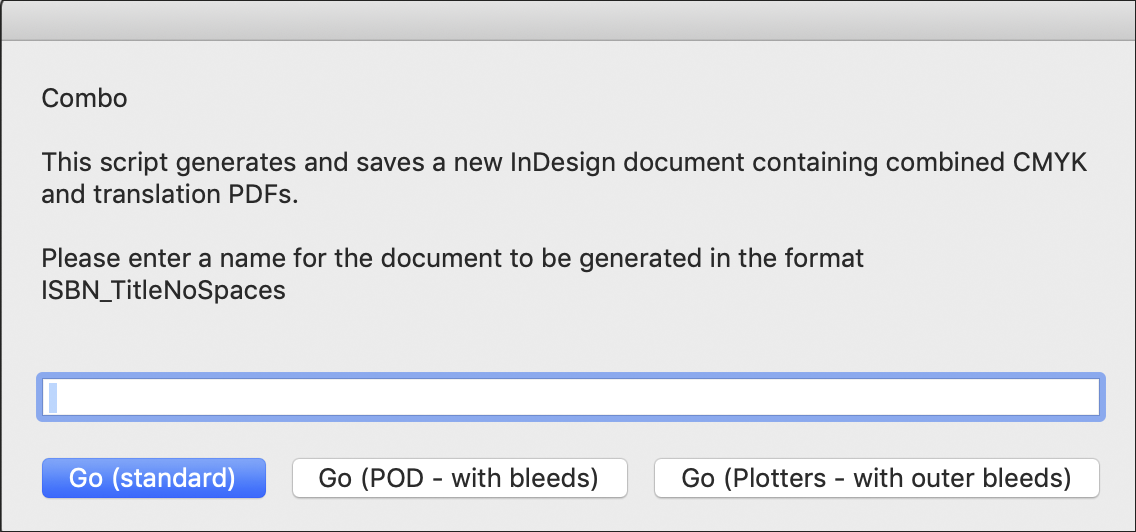
- You will then be asked to choose a folder to package to, choose a folder where you want the InDesign file to be created.
- You will then be asked to select the folder containing the CMYK PDFs.
- And then to select the folder containing the text PDFs.
- The script will then run. When it has finished you will see a message similar to the following: Completed. Combined 25 CMYK and Translation PDFs.
- Click OK and the folder containing the InDesign file will open.