“How to use this book” pages
Last modified: December 15, 2023
Getting started
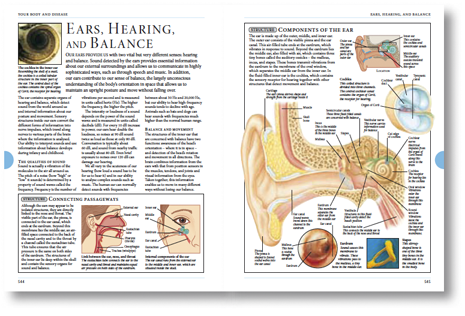
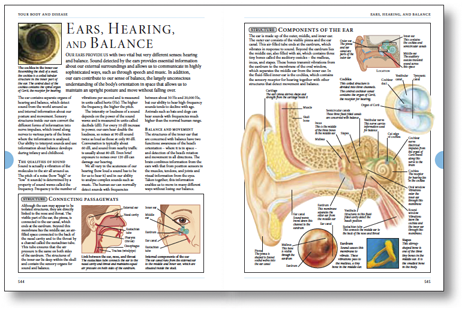
‘How To Use This Book’ pages contain miniature representations of spreads from elsewhere in a book. Despite their small size, it is still necessary for any text they contain to be translated and replaced by co-edition publishers.
In InDesign we achieve this by using CMYK and text PDFs as placed illustrations on these spreads. (DO NOT USE print ready PDFs for these miniature PDFs).
This has several advantages over our older techniques, not least the advantage of allowing us to place CMYK PDFs before the text on the placed miniature spreads has been finalised.
Co-editions
Co-editions should re-link the placed text layer PDFs with their own versions using the following process below. The colour layer must not be touched!
Process
Open the “How to use this book” spread
Each placed miniature spread will be created from a single full size PDF spread of the colour and text layers (Co-editions – you only make the text layer version).
Create miniature PDFs
Create two PDFs of the required spread(s) (one with the CMYK layer only showing, and another one with the UK/US layer only showing).
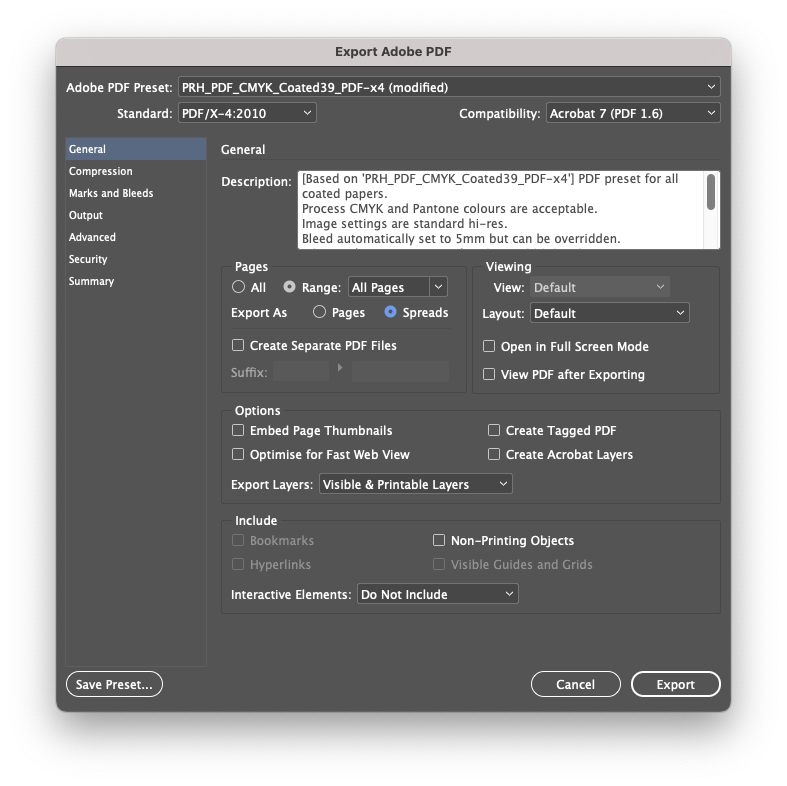
For the CMYK layer, output to PDF by using the PRH_PDF_CMYK_Coated39 setting (PRH_PDF_CMYK_Uncoated47 for uncoated books) but BEFORE you press Export, check the Spreads box and then go to Marks and Bleeds on the left side panel and uncheck the All Printer’s Marks box and all the boxes underneath it. Also, change the measurements under Bleed to 0mm.
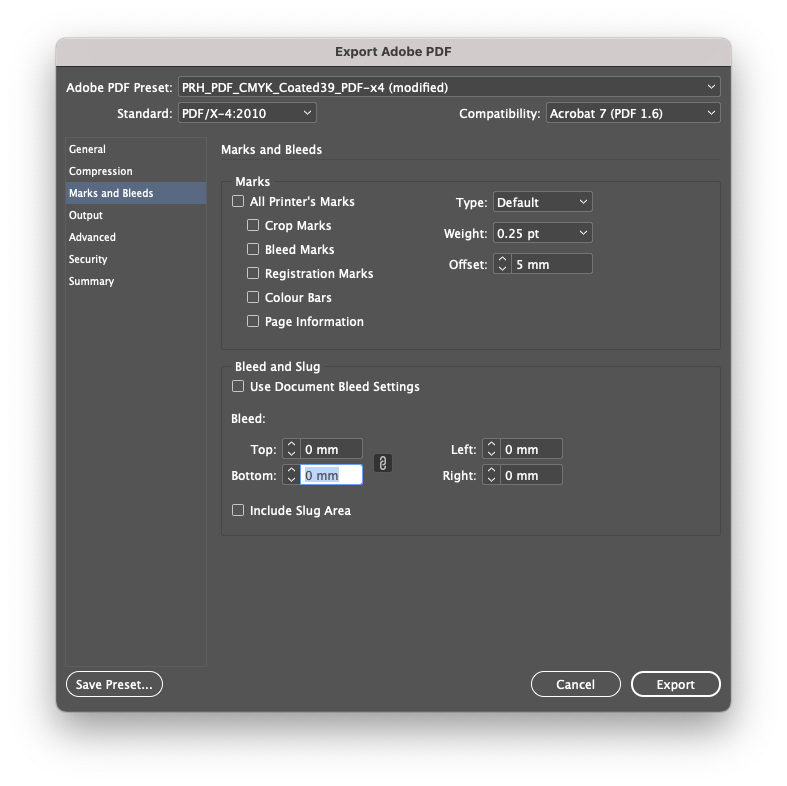
For the UK/US layer, output to PDF by using the PRH_PDF_Translation setting and (as above), BEFORE you press Export, check the Spreads box, go to Marks and Bleeds on the left side panel and uncheck the All Printer’s Marks box and all the boxes underneath it. Also, change the measurements under Bleed to 0mm.
![]()
![]()
To ensure that these PDFs do not fail SourceReport, please use this naming convention:
e.g. 076-077_CMYK.pdf, 076-077_UK.pdf or 076-077_US.pdf
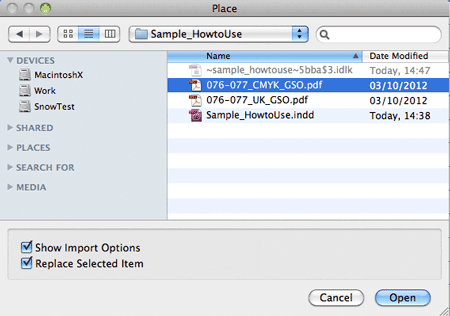
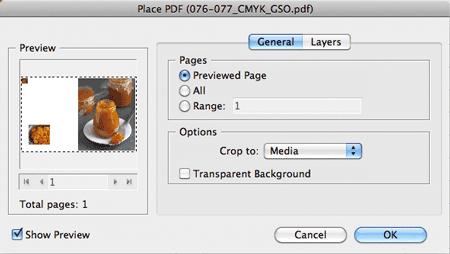
Once you have made those PDFs, go to your How to Use page and import the CMYK PDF on the CMYK layer. However, before clicking on Open, make sure that the Show Import Options box is checked. (see screen shot below)
Under General, choose Crop to: Media, make sure Transparent Background is unchecked and click on OK.
Position that spread in the box, adding box rule and shadow if required (see Extra styling below).
Select that box, step and repeat it in the same spot and move the new one to the UK/US layer.
Import the UK/US PDF into this new box but this time make sure Transparent Background is checked.
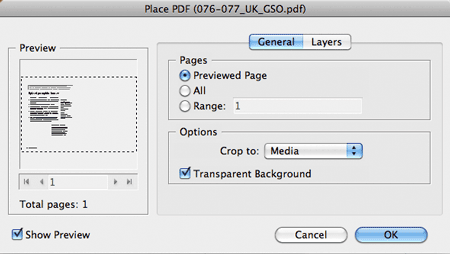
Press OK and the image should place itself automatically in the same spot. (Don’t forget to remove any box rule and shadow from this box, these are only needed on the colour layer).
- For Uncoated books only and only on the How to Use this Book spread, please do the following: In InDesign, go to EDIT > COLOUR SETTINGS and while you are in the PRH_Colour_Settings_Uncoated47, change the COLOUR MANAGEMENT POLICIES > CMYK to Preserve Numbers (Ignore Linked Profiles). This makes sure that we get a single colour black in the translation PDF.
Extra styling
Adding a drop shadow around the spread
- Select the two placed CMYK pdfs
- Ensure that they both have a background fill of [Paper] applied in InDesign
- In the menu bar go to OBJECT > EFFECTS > DROP SHADOW
Ensure that the drop shadow is set to ‘multiply’ in order that it interacts with anything on the page behind it, rather than knocking out any colour there.
Adding a keyline around the spread
- With the text layer hidden, copy and paste in place another set of the two placed CMYK PDFs.
- With the two duplicate frames still selected, in the menubar go to OBJECT > PATHFINDER > ADD to merge the two boxes into a single rectangle that frames the entire spread.
- Delete the content from this merged box and apply a stroke to it. Ensure that it sits on the CMYK layer.
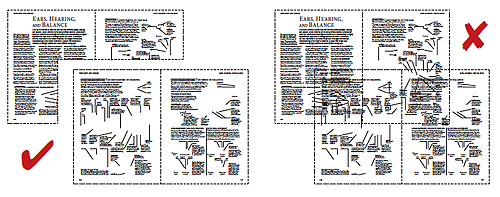
Overlapping spreads
If two or more spreads overlap, you need to ensure that text at the back does not show through the PDF in front.
But… because the colour layer must remain visible behind the text PDFs, unlike the CMYK PDFs, text PDFs at the front cannot be given a solid fill in order to mask the PDFs behind them.
To get around this you must create shaped picture boxes for any text PDFs behind the front one to sit in, that exclude any area of overlap.
- Duplicate the front text PDF and ‘Paste In Place’ so that a copy sits exactly on top of the original one.
- Shift and click on the rear text PDF so that both the front (copy) and back text PDFs are selected, then in the menubar use OBJECT > PATHFINDER > SUBTRACT to delete the area of the front PDF, from the back one.
Frames containing text PDFs must be shaped so that they do not overlap, in order to prevent text at the back showing through the PDF in front – but frames containing CMYK PDFs can be given a fill of [Paper] in order to mask the PDFs behind them.