Flash cards set-up
Last modified: May 20, 2022
Document set-up
Flash cards can be set up in two ways within InDesign depending on the series or nature of the content, as follows:
1/ One card per InDesign document, i.e. both sides of the card in the same InDesign file (e.g. English for Everyone Junior series). You can set up multiple card documents if you wish but make sure they are broken up into natural sections which are not too big. Too many cards in one document can create file size issues and problems when doing corrections after archive.
If flash cards have page numbers:
- The InDesign file name will depend on the page numbers (e.g. 037-038_Cardname.indd)
- The front of the card should be set up as page 37 in the Section Start of the Numbering and Section Options…
- The back of the card will follow automatically. No need to change anything in the Numbering and Section Options…
- The PDFs (created using Exporter) will be numbered in sequence from 001 – giving twice as many PDFs as InDesign files.
If flash cards do not have page numbers:
- The InDesign file name will depend on the card number (e.g. 037_Cardname.indd)
- The front of the card should be set up as page 37 in the Numbering and Section Options…
- The back of the card should be set up with a new Start Section and also have 37 as the page number but with the prefix BF- (for Back Flap) added to the Numbering and Section Options… > Section Prefix
- This means that your card will have two section starts instead of one.
- PDFs will automatically be named as follows (using Exporter):
037_xxxxxx_CMYK.PDF / 037_xxxxxx_UK.PDF
037_xxxxxx_CMYK_BF.PDF /037_xxxxxx_UK_BF.PDF (xxxxxx indicates the work reference)
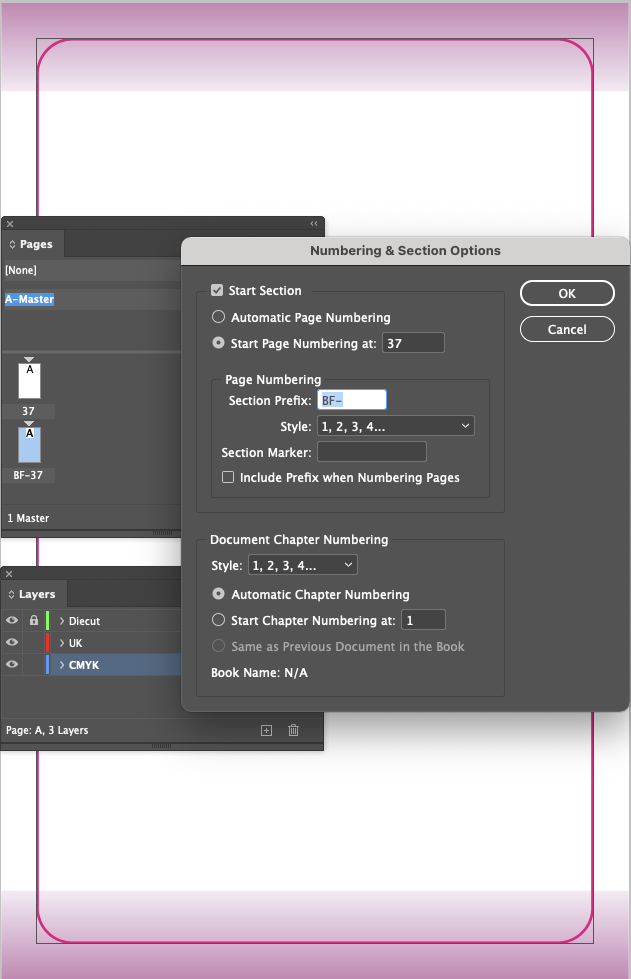
Note: The first page number of flash cards will always be an odd number
2/ One side of each card per InDesign document (e.g. SuperSimple Revision Cards series).
- The InDesign file name of the first card will be 001_Cardname.indd. The section start within the Numbering and Section Options… will need to change according to the number of the card.
- The PDFs (created using Exporter) will be numbered in sequence from 001 – giving the same number of PDFs as InDesign files.
Bleed
As per DK standard, bleed should be set to 5mm. Do not use rounded corners for bleed background or images. Bleed should be set up in full and continue beyond the Diecut to the bleed guides, as per the screengrabs above.
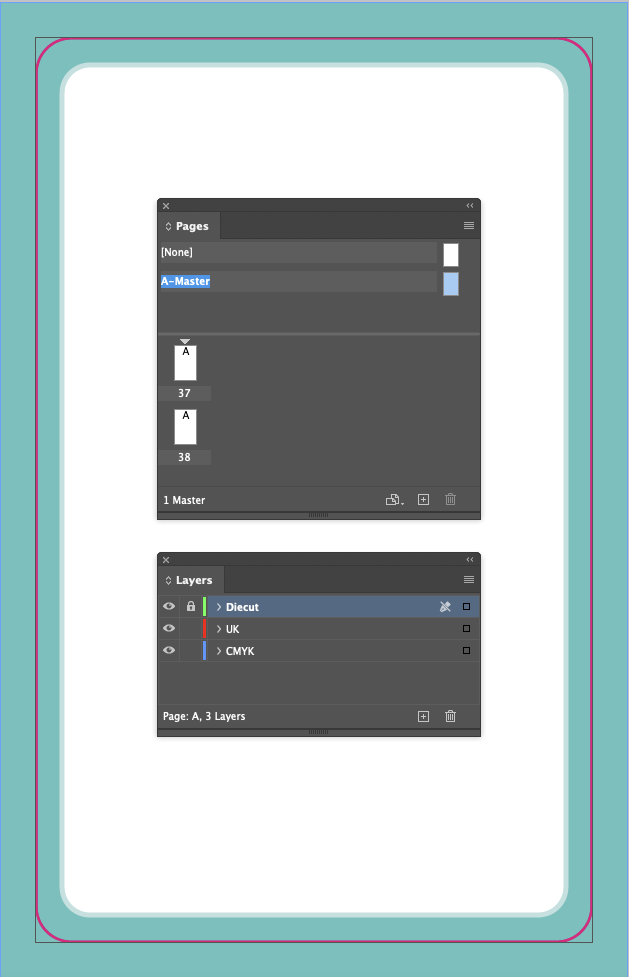
Diecuts
Diecuts should be set up on a separate layer called Diecut on the master page. That Diecut layer should be locked.
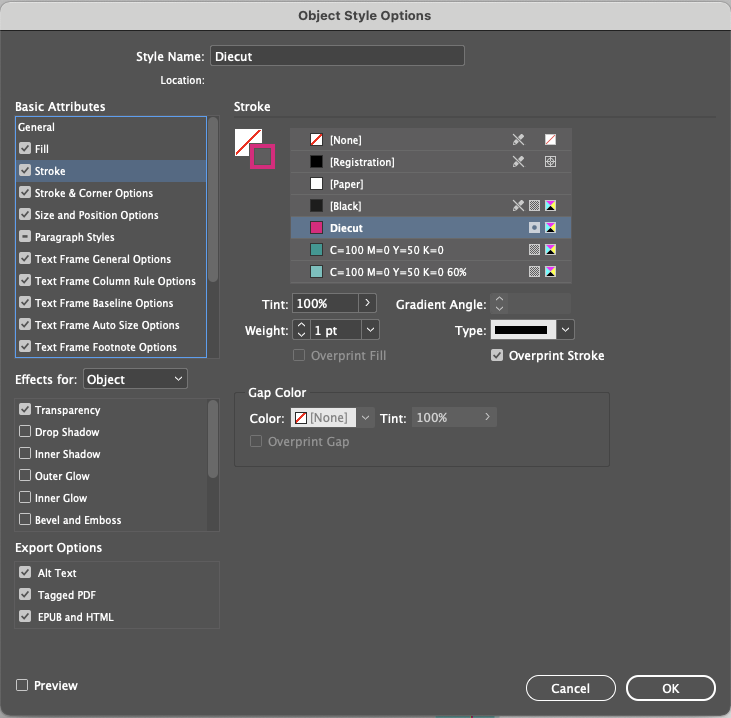
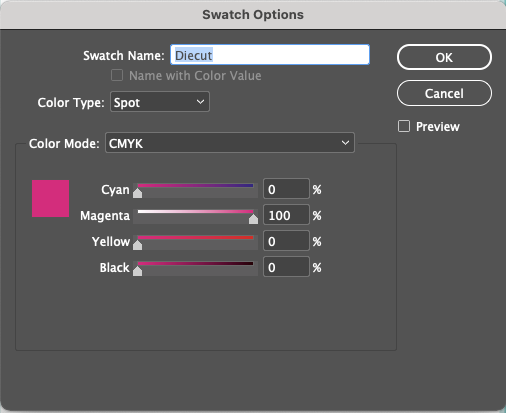
As per DK standard, diecuts should ideally be set up as an Object Style with a spot colour called Diecut (same name as the layer), with a 1pt solid stroke (not dotted) with no fill colour, and the stroke should be set to overprint.
All page items should be a minimum of 3mm clear of the diecut.
Masters
The master should only contain the diecut and any recurring elements needed on every card.
If you are using chapter/section colours as backgrounds, strokes, etc. there is no need to create a master per colour. One master displaying one swatch colour is sufficient. As long as you have set up all the chapter/section colours you might need in your Swatch palette, when you come to creating a new page, you can delete the master colour and replace it with the desired one from the Swatch palette.
Template advice
We would advise that you create a new template for new flash cards and follow the instructions above. Previous flash cards may have been corrected for technical reasons after the template was created and the template not updated.
Should you need a reminder on how to set up templates in general, please click here.
How to Use this…
If this is needed, please follow the same set up and PDF instructions as per our How to Use this Book page. Click here for instructions.