Visuals for sales material
It is often necessary for our sales team, translation team or co-ed partners, to be able to show their customers a visual of what a finished product will look like. This is particularly important in the case of covers containing special finishes, pop-up books, books with flaps, sticker books and other novelty titles.
These visuals should be done in time for the sales material deadlines and updated for final material.
This process should be followed for every titles with novelty elements. It will initially be used for UK/US final sales material, and then for co-eds/translations sales material.
In order to create these visuals, we will need to add an extra layer within the corresponding spreads/covers in InDesign. This layer should be called VISUAL, (to set up this layer not to print automatically, you will need to unclick Print Layer in the Layers options). This layer should not be deleted at any point, as it will need to be archived and accessible to our translating or co-ed partners to create their own sales material.

For covers with special finishes
Create a separate layer called VISUAL and set it to show how the finished product will look like. Our translating/co-ed partners should be able to follow the same example once they have translated the cover.
In the example below, the first screengrab will show you what the cover will look like when all the special finishes are turned on and it is ready to go to the printer. The second screengrab will show you what the finished product will look like and this is what our Sales teams will use as a visual.
Cover ready for the printer
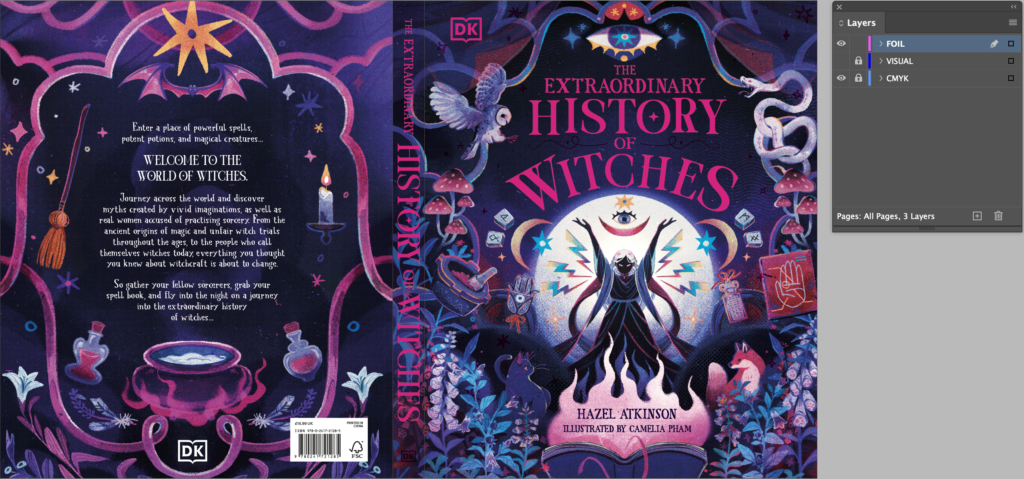
Foil switched off to reveal VISUAL layer
In this instance, the FOIL layer has been switched off and the VISUAL layer has been switched on using a foil simulation. (You will need to click on Print Layer in the Layers options to be able to see this layer and to create JPEGs/PDFs for the Sales team but don’t forget to unclick that option before archiving).

There is no hinge crease in our example but if you want to show the hinge crease, you can lift one from these InDesign guidelines. The hinge crease should also go on the VISUAL layer.
Foil effects
You can use gradient swatches in InDesign to create foil effects. Here is an InDesign file with examples of foil effects. We are currently working on creating a library of foil effect images which will be added to these guidelines in due course.
For insides of pop-ups, books with flaps, novelty titles & sticker books
Depending on the complexity of these books, where the visual cannot be easily done in InDesign, whichever way it is done, the text will need to be isolated so that it can easily be translated and placed on top of the CMYK. This may need to be done outside of InDesign and imported into the VISUAL layer afterwards (the VISUAL layer should be set up in the same way as covers, as indicated above). You may need to write instructions to tell our translation/co-ed partners how the visual was created.
The following example of the inside of a pop up book was done in Photoshop, due to its complexity, and then imported into Indesign. The two screengrabs will show you the inside with the flaps closed and open.
Flap closed
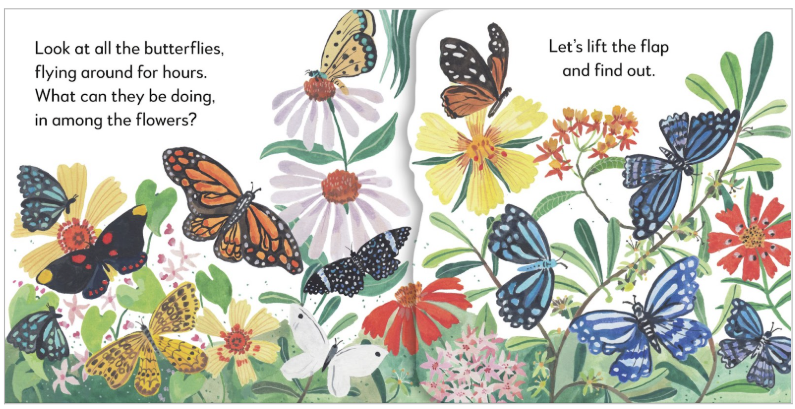
Flap open
More simple visuals could be done entirely in InDesign using drop shadows, as in the example below:
Flap closed
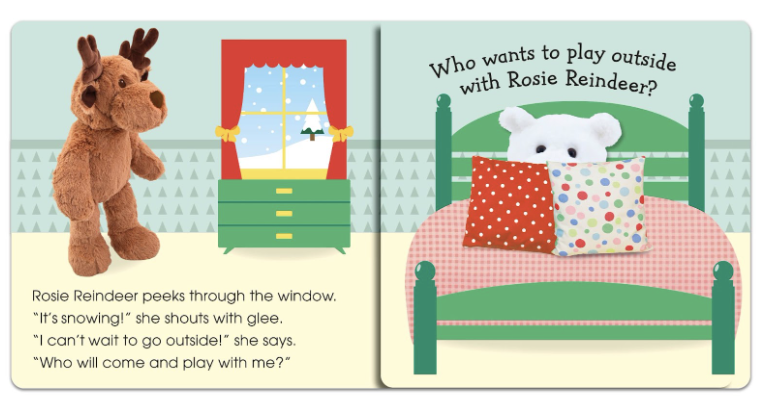
Flap open

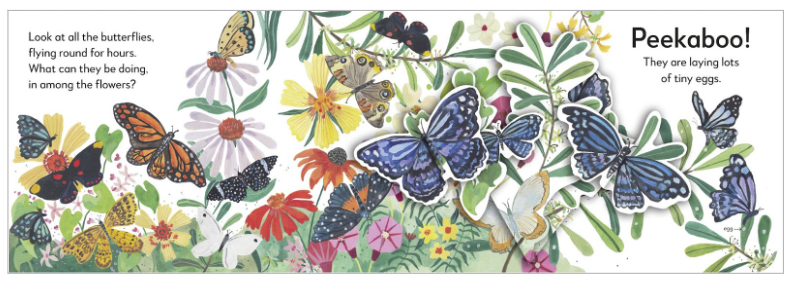
Sticker book example
Without stickers in place
VISUAL layer, showing stickers in place

Complex flap books
For more complex novelty titles with multiple flaps, the visual may need to be created entirely in Photoshop. Here are some examples of what can be achieved:
Flaps closed

Flaps open
For older titles that don’t include the VISUAL layer
As our translation/co-ed partners are unable to create this material themselves due to a lack of expertise or budget, we may either have to go back to the creative teams to assist with these requests, or ask our Delhi team to create them.
For old titles where the printed book is available, it may be easier to take a picture of or scan the book, Photoshop out the text, and replace the text with the correct language.
Archiving of visuals for sales material
As these visuals will need to be easily accessible by anyone needing to use or recreate them, any that have been created as a separate file (i.e. .psd, etc.) will need to be stored in the book folder in the Co-Ed Guide sub-folder as per this screengrab.
