Video general set-up
Unless you are making a video or animation for a project that requires exporting as a specific size or type, the following guidelines should be used to produce a video that can be distributed on sites like YouTube, for presentations and general use.
General set-up
Recommended software
Premiere Pro CC, After Effects CC, Adobe Media Encoder CC

Video dimensions
HD video project files should be set up with the standard dimensions of 1920px by 1080px. This produces a screen ratio that is 16:9, which matches widescreen televisions, most monitors and other video displays. (It may be that a different screen ratio is required if a video is intended for something specific. For example, a video that is intended for an iPad screen only would be better suited to a screen ratio of 4:3 as it is more square in shape.)


Frame rate
Video capture from cameras can vary in frame rate. Use a frame rate that is suitable for the project you are making. Generally, video is captured traditionally at 24fps (NTSC – US television standard) or 25fps (PAL – UK television standard) but with media displayed on digital displays and services such as YouTube, frame rates of 30fps or even 60fps are common. If possible, if you are creating footage or animations and combining them together, use a frame rate that is the same across all sources.

Briefing
When designing or briefing for a video/animation it is useful to follow a briefing guideline so that key information can be decided in advance of production. The brief helps anyone involved with the project know what it is you are trying to achieve. Examples of things to consider in briefing for a video include:
- Who is it for? What is the target audience?
- What is the outcome?
- How long do we want it to be?
- What do we want it to cover?
- How will this be used in the campaign?
Storyboard
Storyboarding helps show what is trying to be achieved visually in the video and helps with shooting, animating and timing. A simple set of sketched panels can show camera angles, the action in scenes and gives a sense of timing for anyone directing and producing a video. Questions can then be asked and decisions made in advance of production. Below is a simple storyboard template that can be downloaded.
Preparing assets for animations or video overlays
The most efficient way to use assets such as images in video projects is to resize and optimise them before placing them into a project. It is sometimes useful to lay out the assets in another application such as Photoshop or InDesign using a blank document that is set up as 1920px x 1080px in order to scale images. This will reduce the time it takes to render out the final video.
- Images should be saved as RGB and 8bit.
- Transparency is supported in PSDs and PNGs
Exporting for YouTube and general
If you are exporting a video for uploading to YouTube or for placing into something like a PowerPoint presentation, use the following preset for the Adobe Media Encoder.
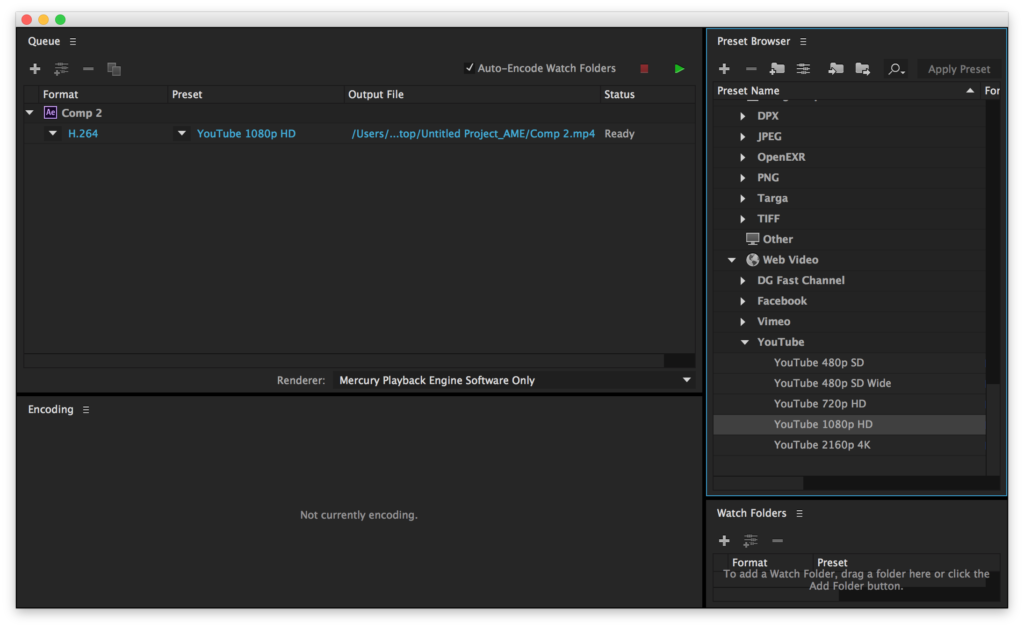
- 1920px x 1080px
- Same frame rate as the project file
- H.264 video codec
Collecting project files for distribution or archive
Similar to how InDesign can package up the links used in a project, both Premiere Pro and After Effects can do the same. This is helpful when having to share a project with someone else or when you are ready to archive. There are a few options to consider in this process.
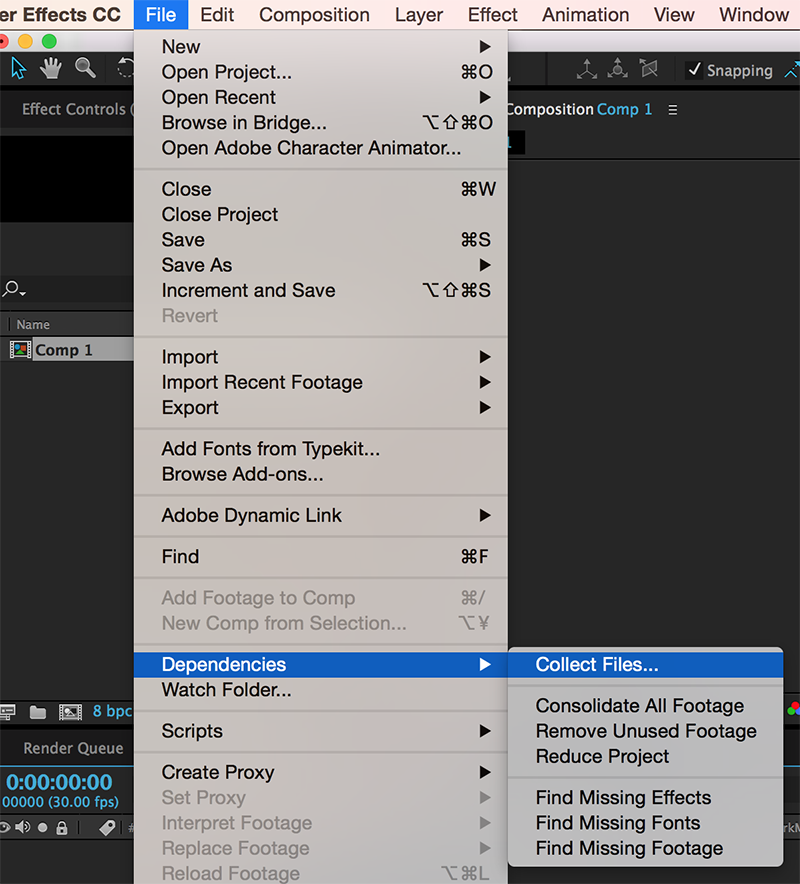
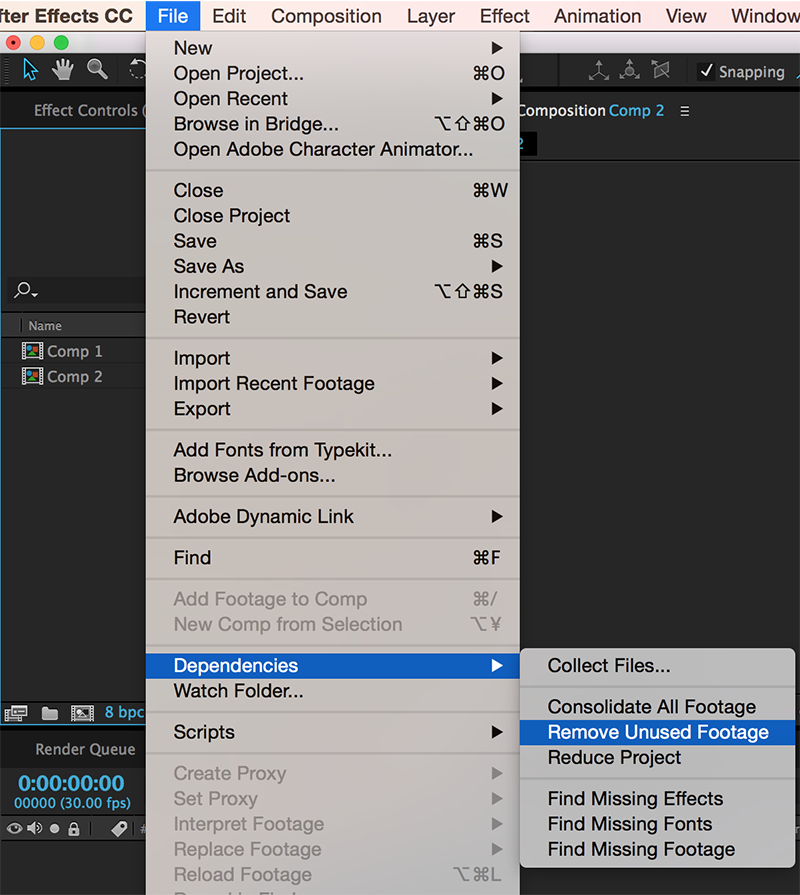
1. Remove unused footage
This option will remove links to any files that have been brought into a project that haven’t actually been used in a composition (examples would be images that were used as placeholders or if a selection of sound effects were being tried). This helps reduce the collecting of unnecessary files during the next step.
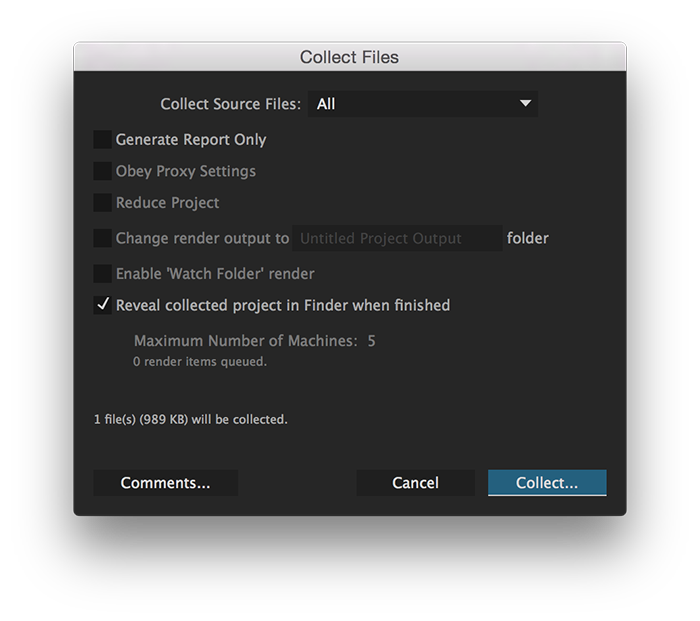
2. Collect files
This option allows you to re-save the project file and move any assets referenced in it to the same location. The folder structure of the assets mirrors how it was organised within the project.