Special finishes course – 3D embossing
3D embossing
There are 2 types of 3D embossing
- Multi-layered embossing produces a stepped relief which involves pressing a multi-layered metal tool to the underside of paper in order to create raised areas of varying height.
- Sculpted embossing produces a graduated relief which involves pressing a sculpted metal tool to the underside of paper in order to create a more realistic 3D effect.
Both types of 3D embossing require the same set up from the designer which is mentioned below. The differences occur in the way in which the Printer will use the files supplied. The multi-layered embossing tool will be created directly from the files supplied but the sculpted embossing files merely serve as a guide. The Printer will have to use a degree of artistic licence in order to create the sculpted embossing tool. As a result, the Printer will supply either a 3D PDF of a 2D render of the sculpted embossing tool for approval.
Things to consider
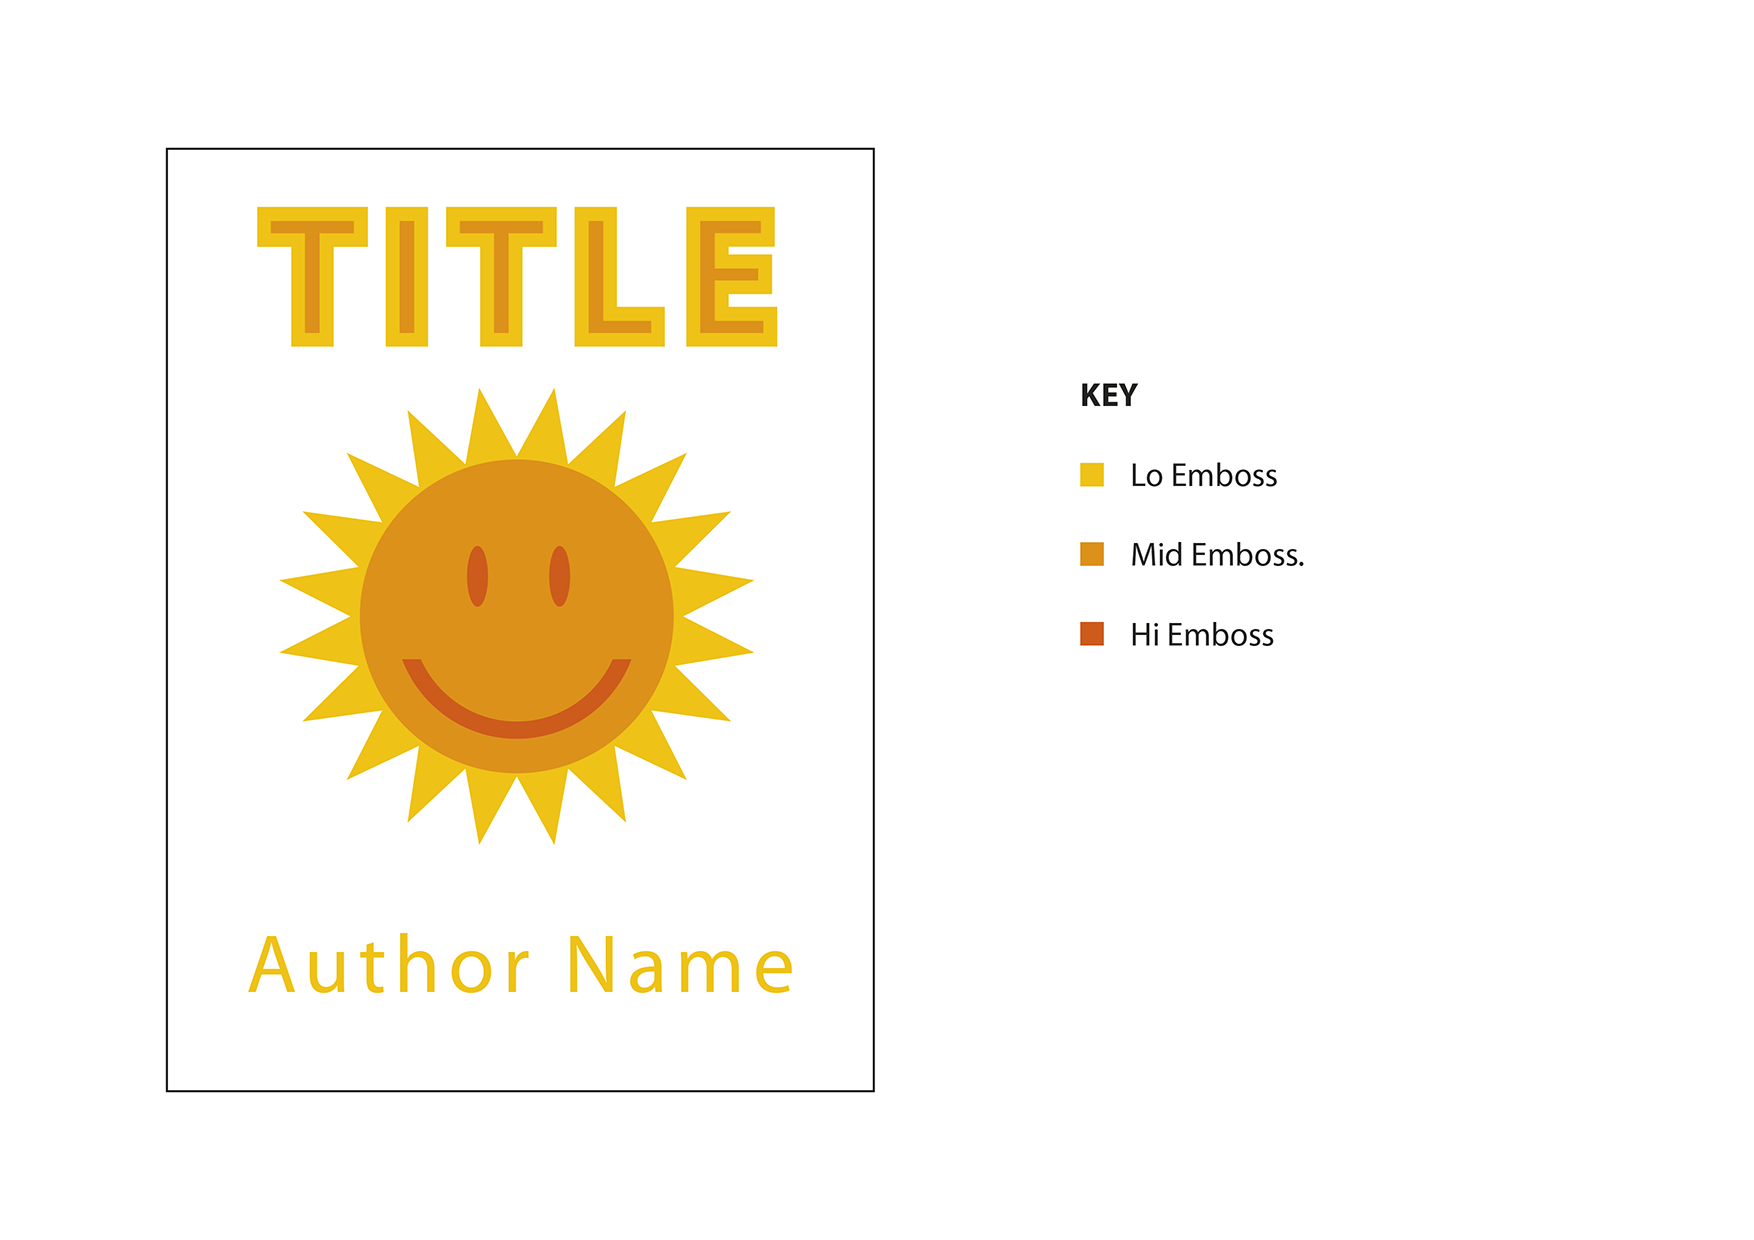
- Each level of embossing should be a separate spot colour with a relevant name (eg. Low Emboss, Middle Emboss, High Emboss).
- Each level of embossing should be a separate image and placed on a separate layer within InDesign.
- Create stacked layer shapes as opposed to interlocking layer shapes for accuracy and flexibility (please see the example below).
- Use a 100% spot colour tint for all embossed elements.
- Embossed elements must be hard edged and should not contain any gradients or feathering.
- All embossed elements should be set to overprint.
- Very fine details cannot be maintained. The minimum recommended stroke weight for fine details is 1pt.
- Blind embossing or debossing fine details has a 2pt minimum recommended stroke weight. This is because the lack of printed ink defining the shape creates a less detailed look.
- Cracking and flattening can occur in embossed or debossed areas closer than 6 mm from the trimmed edge, folds or 10mm from the cover pinch/hinge/divet area.
Creating stacked layer shapes as opposed to interlocking layer shapes has 2 benefits:
- You won’t accidentally end up with any unwanted gaps between the shapes of the different layers.
- A future edition, reprint or co-ed that had a tighter budget could switch off the top 2 layers and easily create a single level embossing to make a saving.
Example:

- Drawing the shapes completely independently has an increased chance of inaccuracy which could result in unwanted gaps between the levels.
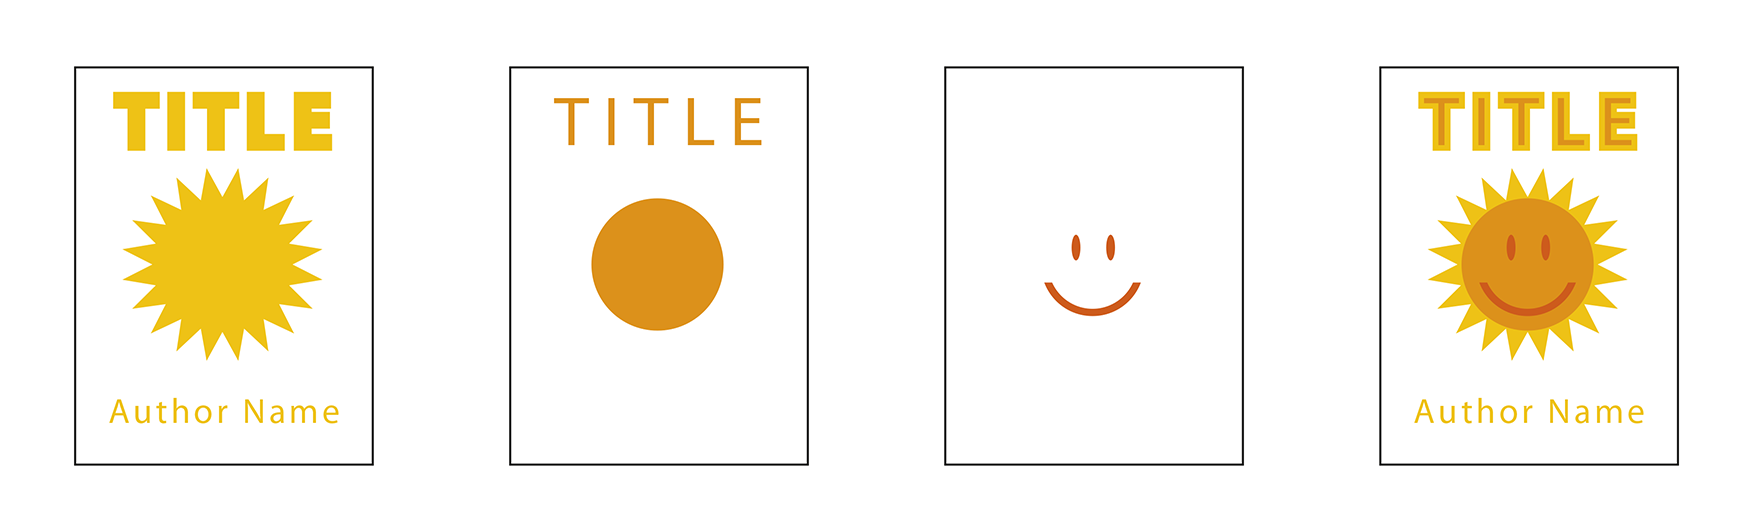
- Stacking the shapes like this means the first layer could be used to create a single layer embossing file.