Image properties in Adobe Bridge
Overview
We recommend Bridge is primarily used to check the resolution of images, but it has other functions listed below.
More information below on:
- Navigation to files
- Previewing images to check quality
- File properties and image sizes ready to print
- Metadata and Copyright information
Dimensions can be changed to cm’s under Preferences (see below).
What is Adobe Bridge?
Provides easy navigation, access and information to our design assets, similar to the operating system, but with improved file previews, metadata lists, and features including batch file renaming, image contact sheets and water marking.
The Bridge window will look something like the screengrab above and below, with ‘workspaces’ (top right corner) that show different viewing environments. We recommend you use the Essentials workspace for viewing and navigation. It is also fully customisable.
![]()
In the Essentials workspace, the Content tab will display the files within the location you have navigated to, previews can be resized using the slider (bottom right corner), and file information can be displayed in different formats with the icons next to the slider (see below)
![]()
Start using Bridge by selecting Essentials workspace (top right corner)
Using Bridge
Navigation
Start by selecting Essentials workspace (top right corner)
![]()
Locating your files to view in Bridge, can be done 1 of 2 ways
1. Navigate as normal through Windows to the files location (so you see image files), then drag and drop the yellow folder or path into Bridge and on to ‘Computer’ in the top left corner of the main window
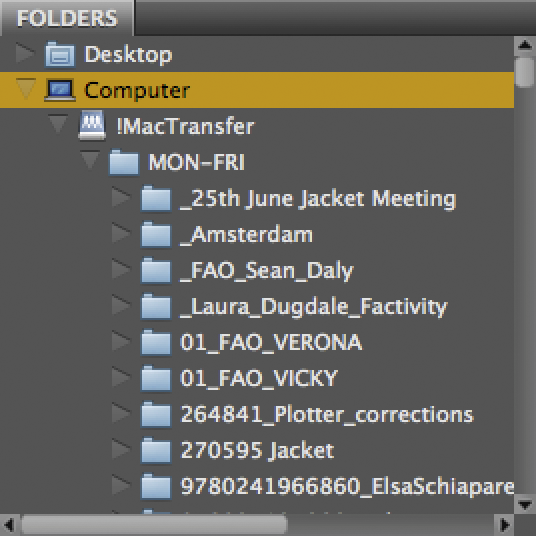
2. Alternatively, in Bridge navigate using the Folders tab (top left corner) to access the ‘R’ drive and navigate through to the relevant share drive
File properties and metadata
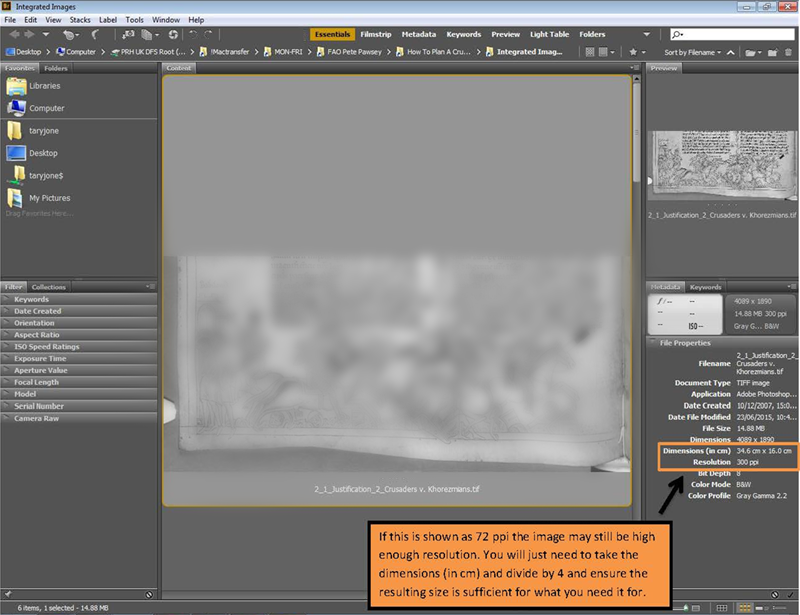
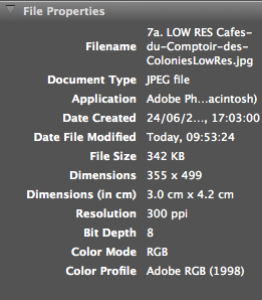
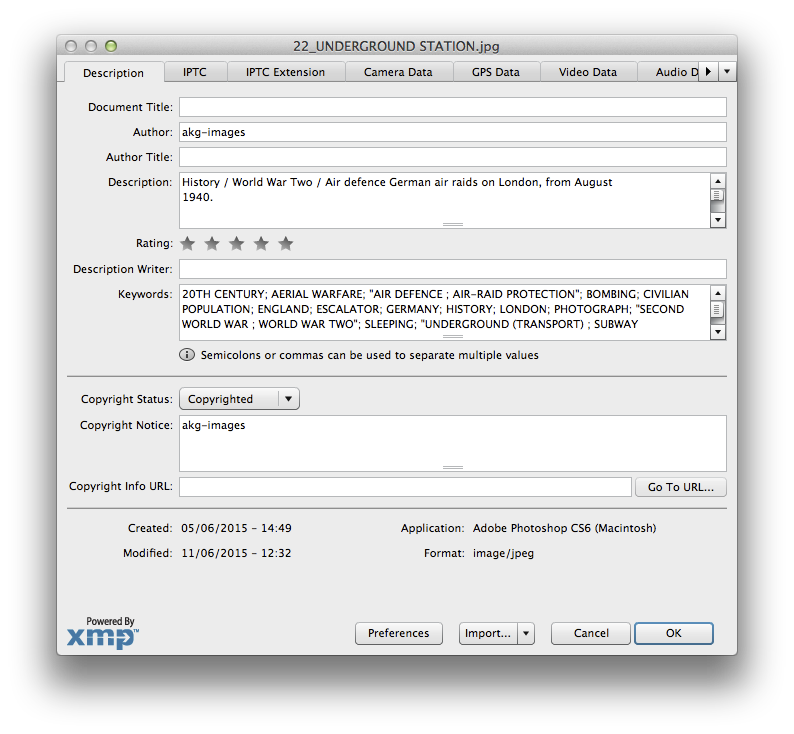
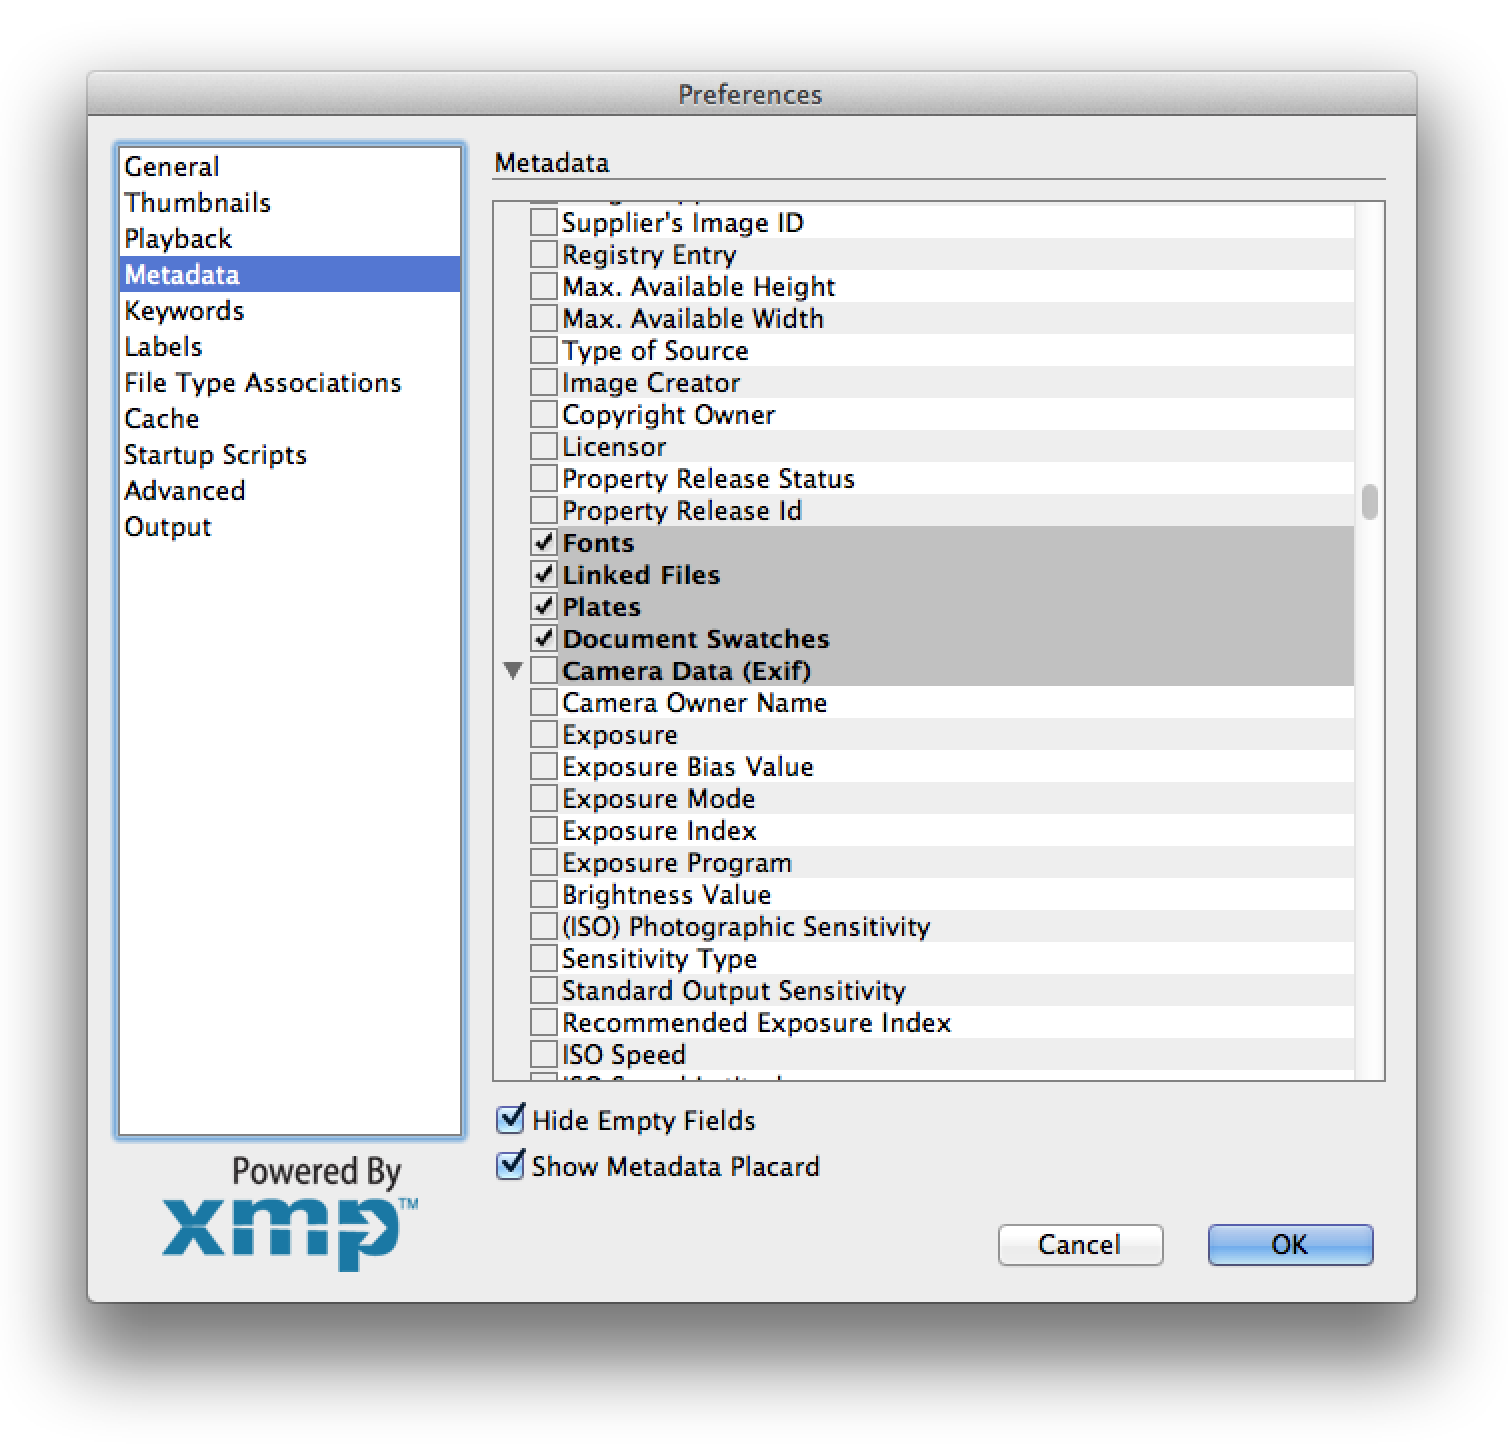
Select a file and under Metadata (bottom right corner) in File Properties window, information about the file will be displayed including modification date, file size, pixel dimensions, resolution and colour mode. If resolution is set to 72ppi, simply find the Dimensions (in cm) and divide by 4 to get an approximate physical print size. At 300ppi resolution, the file will print at its displayed Dimensions (in cm). InDesign document data, will also show fonts and swatches used (see preferences section below, if not shown in the File Properties tab)
More information on author, description, keywords, copywriter status and notice about an image, can be found by right clicking on an image and selecting ‘File Info…’, and will display the following window.
Filtering
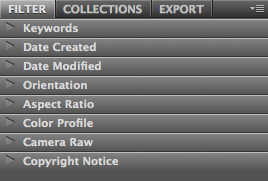
The Filtering tab (bottom left corner – Essentials workspace) can be used to only show images with a certain date, copyright, colour profile, or particular keyword in its metadata, making it much easier to find an image or images. Simply open a draw under the Filter tab and click on an item to filter to that item.
Preferences (you only need to do this once)
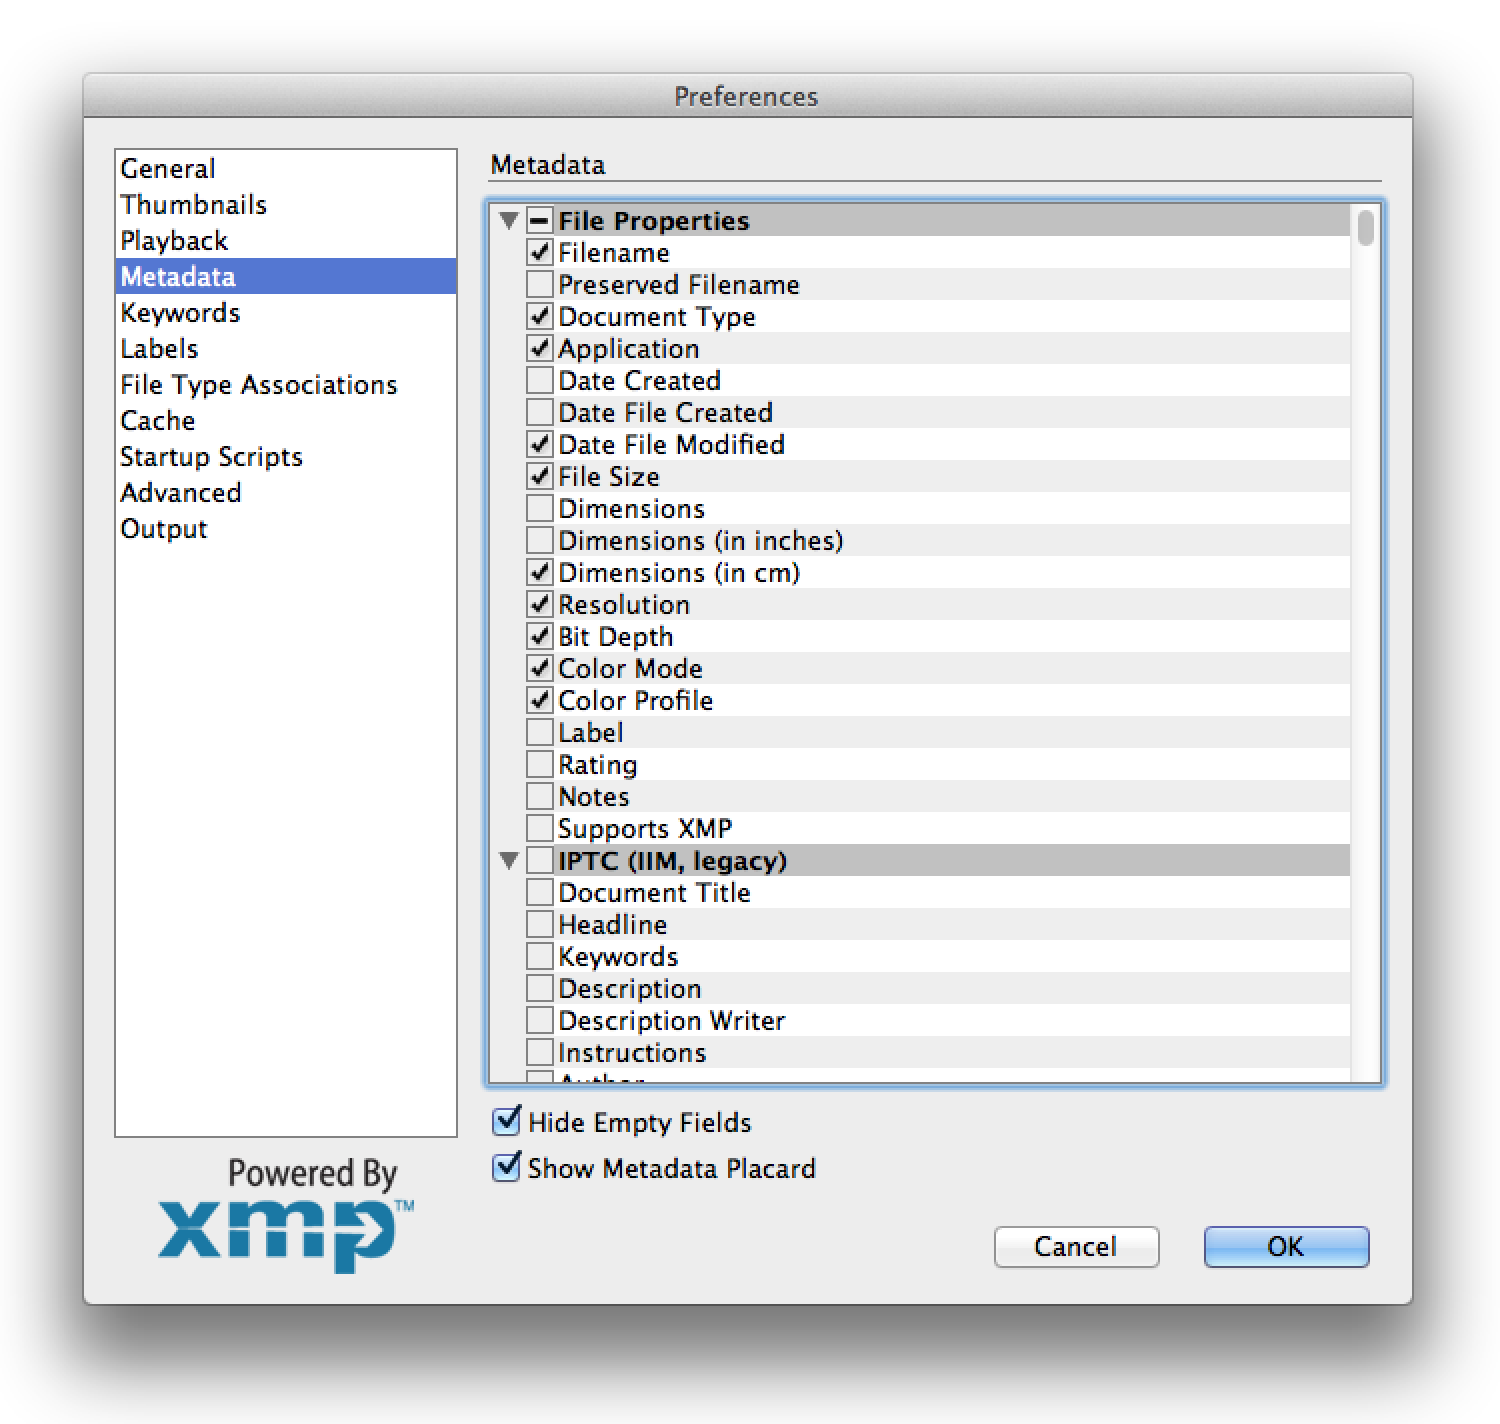
Bridge can display a lot information that you don’t need. To see only what you really only need see, in Adobe Bridge find Preferences option in the menubar at the top, and under Metadata select the Metadata tags shown below and deselect all other Metadata tags. To edit these preferences go back to EDIT > PREFERENCES > METADATA and select the metadata tag to be displayed in the File Properties tab when an image is selected.
Contact sheets (available only with Photoshop installed)
Please note, this feature does not produce colour accurate PDFs and it is recommended only for laser proof output. If you have Photoshop installed, we recommend you use Contact Sheet II in TOOLS > PHOTOSHOP > CONTACT SHEET II… for colour accurate sheets.
To create a contact sheet, follow the steps listed below:
- Select the Essentials workspace
- Navigate into the folder containing the relevant images, making sure they are displayed in the Content tab
- Select the Output workspace (top right corner)
- Select the images you wish to use. The selected images will appear in the Preview tab
- In the Output tab, adjust the settings for Document, Layout, Overlays and ignore the other tabs
- Preview your contact sheet by clicking ‘Refresh Preview’ button at the top of the Output tab
- Click the ‘Save…’ button at the bottom of the Output tab to create the PDF contact sheet, save to your desktop
- This PDF will now be available on your desktop to print as required
More information on this and other features can be found on Adobe’s website:
https://helpx.adobe.com/bridge/using/create-web-galleries-pdfs-adobe.html